Drywall Installation in Irvine, CA
Irvine Drywall provides drywall installation Irvine CA homeowners can use for new rooms, remodels, wall replacement, ceiling replacement, additions, and other residential projects that need properly installed and finished drywall.
A good drywall installation is about more than fastening sheets to framing. Sheet layout, seam placement, screw depth, corner treatment, joint finishing, sanding, and surface preparation all affect how the final walls and ceilings look once primer and paint go on.
The goal is a flat, clean surface with straight corners, properly finished joints, and no obvious seams, screw dimples, ridges, or uneven transitions.
Drywall Installation for Irvine Homes
Drywall installation Irvine CA projects can include a new build, room addition, remodel, wall replacement, ceiling replacement, or repair project where a larger section of drywall needs to be rebuilt.
Some projects involve hanging drywall over newly framed walls. Others involve replacing drywall that was removed because of water damage, access work, remodeling, or previous deterioration.
For smaller localized repairs, visit our Drywall Repair page.
Typical residential drywall installation projects can include:
- new interior walls
- replacement wall sections
- replacement ceilings
- remodeled rooms
- garage interiors
- closets
- offices
- bedrooms
- living areas
- plumbing or electrical reconstruction areas
- damaged drywall replacement
- room additions
Proper Drywall Hanging Starts With Sheet Layout
The sheet layout affects both the strength of the installation and the amount of finishing required later.
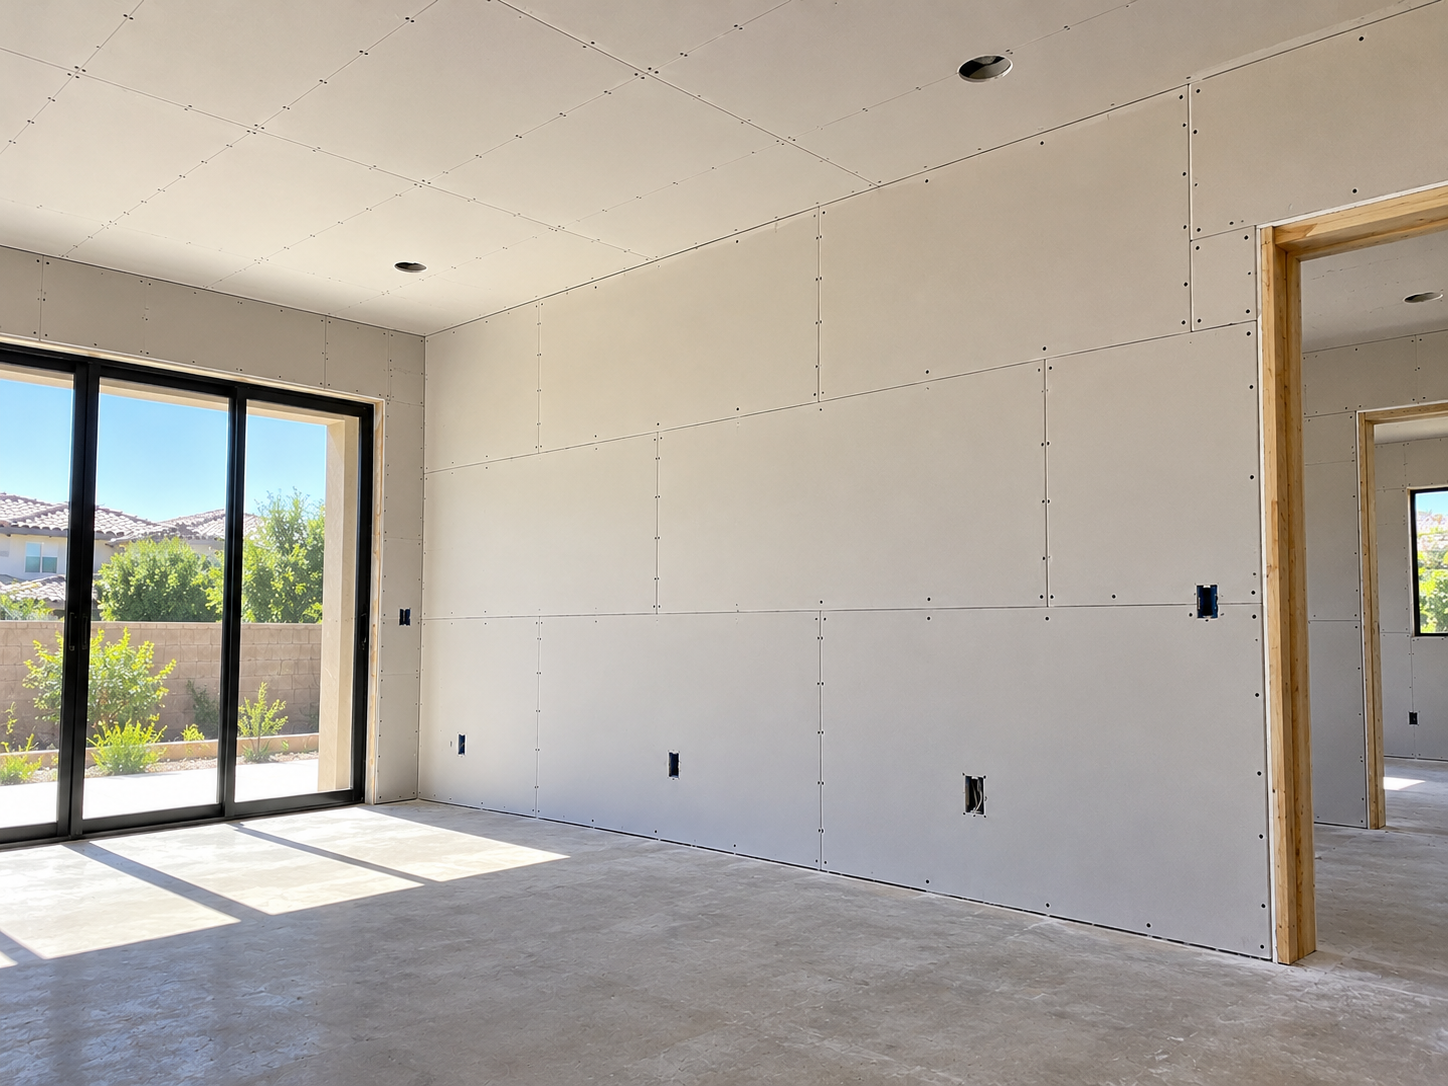
Drywall sheets are commonly installed horizontally on residential walls where appropriate so long factory edges can be joined efficiently and vertical butt joints can be staggered.
A professional layout should avoid unnecessary small pieces and poorly placed seams.
Important details include:
- staggering vertical seams
- avoiding four-corner intersections
- keeping joints supported
- fitting sheets tightly without forcing them
- cutting cleanly around openings
- planning around doors and windows
- avoiding unnecessary joints near high-stress corners
Drywall installation Irvine CA projects should be laid out with the final finished surface in mind, not just the fastest way to cover the framing.
Why Staggered Seams Matter
Drywall joints create areas that later need tape, joint compound, feathering, and sanding.
When seams are poorly aligned, the finished surface can be harder to flatten and may be more prone to visible joint lines or cracking.
Staggering vertical joints helps distribute seams instead of creating continuous weak lines through multiple rows.
Door and window openings also deserve attention.
Rather than creating several small pieces directly above a doorway, a larger sheet can often be cut around the opening so the joint does not terminate directly at the corner where movement can concentrate.
Good drywall installation Irvine CA work is partly about reducing future finishing problems before the joint compound is ever applied.
Fastener Placement and Screw Depth
Drywall screws should follow the framing behind the board in consistent lines.
Random screw placement makes the installation look sloppy and can also indicate that fasteners are missing framing.
The screw head should sit slightly below the paper face without tearing through it.
If a screw is too shallow, it can interfere with finishing. If it is driven too deep and breaks the paper face, it may not hold the drywall properly.
Clean drywall hanging typically shows:
- straight fastener lines
- consistent spacing
- properly seated screws
- no torn paper around fasteners
- no unnecessary screw clusters
- secure attachment at sheet edges
- solid attachment in the field of the sheet
These small details contribute to a flatter and more reliable finished wall.
Ceiling Drywall Installation
Ceiling drywall installation Irvine CA projects have their own challenges because gravity makes any unevenness more noticeable.
Sheets need to be installed securely against the ceiling framing, with joints positioned so they can be finished as flat as practical.
Ceiling work often requires attention to:
- joist direction
- sheet orientation
- recessed-light openings
- electrical cutouts
- ceiling transitions
- soffits and bulkheads
- wall-to-ceiling corners
- long joint lines visible under raking light
Once finished, even a small ridge or depression can become visible when light travels across the ceiling surface.
For repair work on an existing ceiling, see Drywall Ceiling Repair.
Drywall Around Doors, Windows and Openings
Openings create some of the most visible areas in drywall installation Irvine CA projects.
Doorways, windows, built-ins, recessed openings, and framed transitions all require accurate cuts and straight edges.
Poorly planned joints near openings can create extra finishing work and may leave weak-looking transitions.
The drywall should fit cleanly around the opening without oversized gaps.
Corners should remain straight, and the surrounding board should stay in the same plane as the rest of the wall.
A clean installation makes the finishing stage easier and helps produce sharper architectural lines.
Taping and Joint Compound
Hanging the drywall is only the first half of the job.
The seams and fasteners then need to be finished.
Drywall joints are taped and covered with joint compound. Additional coats are applied as needed to widen the transition and flatten the surface. Manufacturer resources such as USG joint treatment guidance explain how different joint compounds are used at each stage.
Different joints require different amounts of feathering.
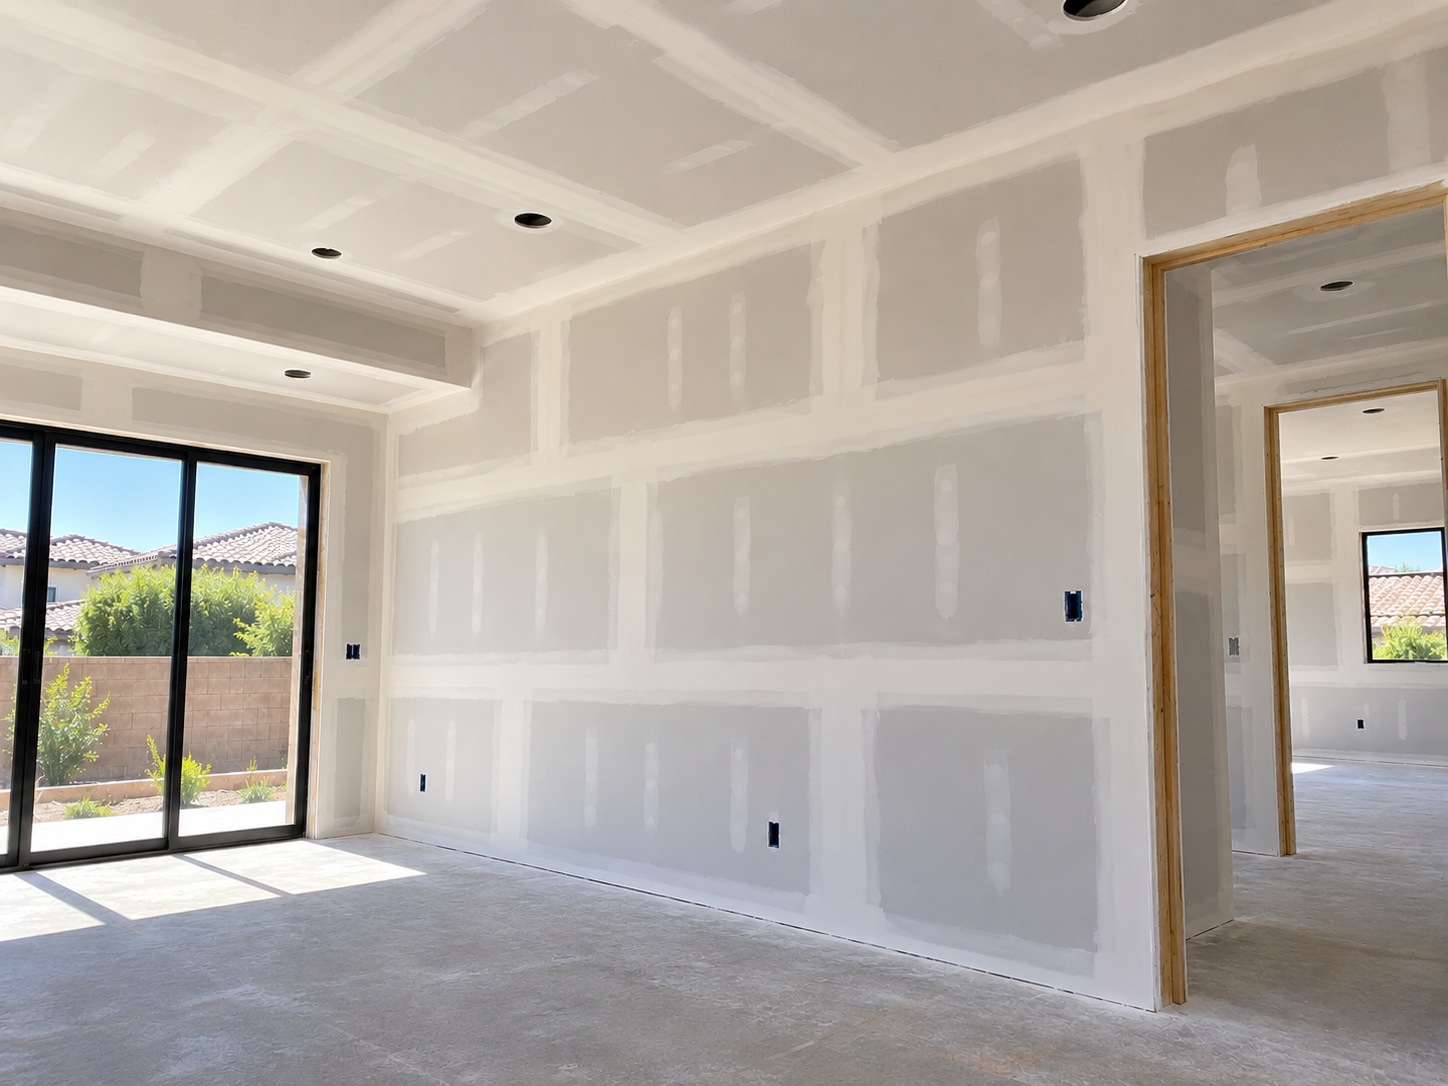
Factory tapered edges are designed to receive tape and compound more easily. Butt joints do not have that recess, so they often need a broader feathered area to make the joint disappear visually.
Drywall installation Irvine CA homeowners see as finished quality depends heavily on this stage.
Why Broad Feathering Matters
A drywall joint can be technically covered and still remain visible.
The goal is not simply to hide the tape.
The goal is to create a gradual transition from the center of the joint into the surrounding drywall so the surface reads as one continuous plane.
Broad feathering helps reduce:
- raised seam lines
- visible humps
- hard joint edges
- shadow lines
- flashing under side light
- uneven transitions after paint
Butt joints typically need more width than tapered joints because there is no recessed factory edge to absorb the compound.
This is one of the main reasons drywall finishing quality becomes especially visible on large walls and ceilings.
Inside and Outside Corners
Corners should look straight after the drywall is finished.
Inside corners require clean tape placement and smooth compound transitions.
Outside corners typically use corner bead or another approved corner treatment to create a straight, durable edge.
The finished corner should not look rounded, wavy, chipped, or overloaded with compound.
Crisp corners matter because they define the geometry of the room.
Even when the large wall surfaces are flat, crooked corners can make the entire installation look off.
Sanding and Surface Preparation
Once the joint compound has dried, the surface is checked and sanded as needed.
The goal is not aggressive sanding.
Too much sanding can damage drywall paper, expose tape, hollow out joints, or create scratches that show through the final finish.
A properly prepared surface should be:
- smooth
- flat
- free of hard ridges
- free of loose compound
- free of visible tape edges
- free of screw dimples
- free of sanding gouges
- ready for primer
The final sanding and inspection stage is where small imperfections can be corrected before coating.
Why Raking Light Reveals Drywall Quality
Strong side lighting can expose imperfections that are difficult to see under flat lighting.
Natural light from large windows or sliding doors may reveal:
- seam ridges
- depressions
- butt-joint humps
- uneven sanding
- screw dimples
- texture differences
- flashing
- inconsistent planes
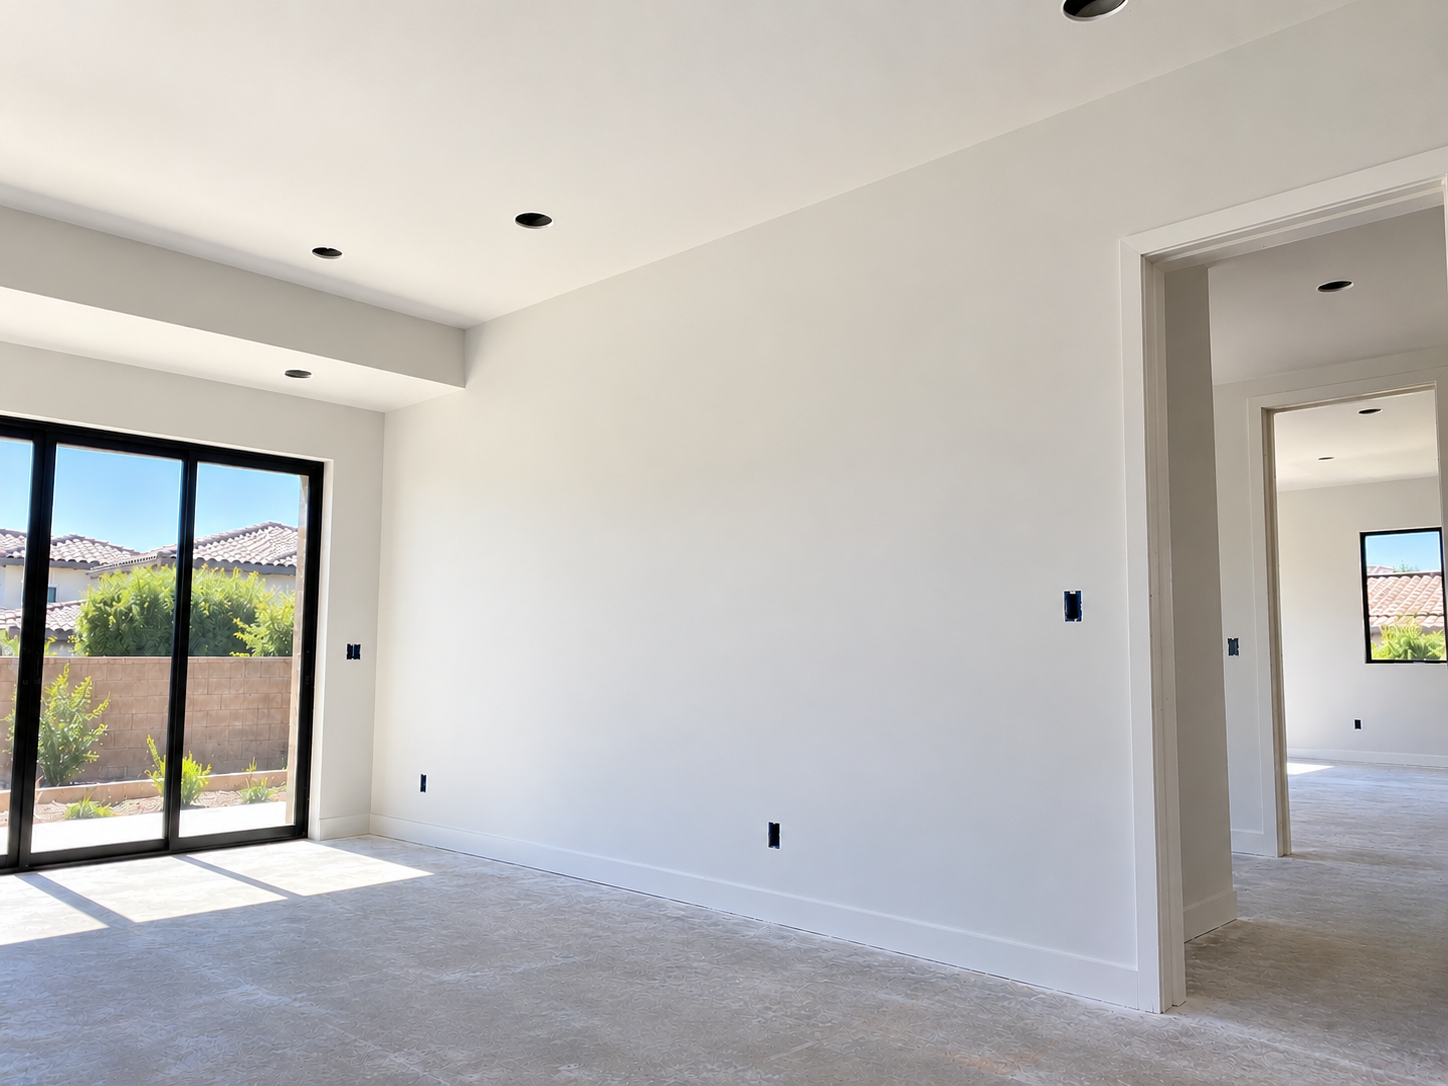
This is especially relevant in modern Irvine homes with large windows, open floor plans, and smooth walls.
A wall that looks fine under diffuse lighting can look noticeably different when sunlight travels across it at a shallow angle.
That is why drywall installation Irvine CA work should be evaluated for flatness, not just whether the joints are technically covered.
Drywall Replacement During Remodeling
Not every drywall installation Irvine CA project starts with open framing.
Remodels often involve replacing sections that were removed for:
- plumbing work
- electrical work
- wall relocation
- water damage
- fixture changes
- cabinet changes
- doorway modifications
- structural access
- previous patch failures
The new drywall needs to transition cleanly into the remaining existing surface.
That can require careful fitting, backing, taping, feathering, and texture matching.
For drywall removed because of a leak, visit Water Damage Drywall Repair.
Drywall Installation vs. Drywall Repair
The difference usually comes down to the amount of material being replaced.
A small hole may only require a patch.
A damaged wall section may need partial replacement.
A remodel or new framed room may require full drywall installation.
Drywall installation may make more sense when:
- an entire wall section has been removed
- large ceiling areas need replacement
- new framing has been added
- multiple small repairs would create too many seams
- existing drywall is too damaged to retain
- remodeling has changed the room layout
For smaller damage, see Drywall Hole & Patch Repair.
Our Drywall Installation Process
1. Review the Installation Area
The framing, openings, ceiling conditions, existing drywall transitions, and project scope are reviewed before sheets are installed.
This helps determine where seams and transitions should fall.
2. Plan the Sheet Layout
Drywall sheets are arranged to reduce unnecessary seams and avoid problematic joint locations where practical.
Vertical joints are staggered where appropriate.
3. Hang the Drywall
Sheets are cut to fit and secured to the framing.
Openings for doors, windows, electrical boxes, recessed lights, and other penetrations are cut cleanly.
4. Tape the Joints
Seams and inside corners are taped so the separate sheets can be finished as a continuous surface.
5. Apply Joint Compound
Joint compound is applied in multiple passes as needed.
Fastener heads are covered, tapered joints are filled, and butt joints are feathered broadly.
6. Finish Corners
Inside corners are smoothed, and outside corners are finished to create straight, durable edges.
7. Sand and Inspect
The compound is allowed to dry and the surface is sanded and checked for flatness.
Ridges, depressions, or other visible transitions are corrected before final preparation.
8. Prepare for Primer and Paint
The finished drywall surface is left ready for the appropriate primer and paint steps.
Fresh joint compound and drywall paper can absorb coatings differently, so proper primer helps create a more uniform finish.
Finished Drywall Should Look Like One Surface
Once the work is complete, the individual sheets should no longer be visually obvious.
The wall or ceiling should read as one continuous plane.
You should not be able to easily identify:
- where one sheet ends and another begins
- where screws were installed
- where butt joints were feathered
- where corner bead transitions into the wall
- where drywall was patched into existing material
The craftsmanship is most successful when the construction process disappears from the finished room.
Drywall Finishes in Irvine Homes
Different homes use different wall and ceiling finishes.
Common finishes may include:
- smooth walls
- smooth ceilings
- orange peel
- knockdown
- light sprayed texture
- painted texture
- combinations of smooth and textured surfaces
When new drywall connects to existing walls or ceilings, the surrounding finish matters.
A structurally sound drywall installation Irvine CA project can still look mismatched if the new finish does not transition naturally into the existing surface.
Texture matching is especially important when only part of a wall or ceiling is being replaced.
Drywall Installation Throughout Irvine
Irvine Drywall provides residential drywall installation throughout Irvine, including:
Woodbridge, Northwood, Northwood Point, Woodbury, Stonegate, Cypress Village, Orchard Hills, Portola Springs, Great Park, Quail Hill, Turtle Rock, Turtle Ridge, University Park, Westpark, Oak Creek, Los Olivos, Rancho San Joaquin, Laguna Altura, and surrounding Irvine neighborhoods.
We serve Irvine ZIP codes including 92602, 92603, 92604, 92606, 92612, 92614, 92617, 92618, and 92620.
If you are searching for drywall installation near me and the project is in Irvine, call or send the project details through our Contact / Fast Quote page.
Drywall Installation FAQs
Do you install drywall for remodels in Irvine?
Yes. Drywall installation can be part of remodels where walls or ceilings have been opened, removed, rebuilt, or newly framed.
The exact scope depends on the condition of the framing and how much drywall needs to be installed or replaced.
Can you replace an entire section of damaged drywall?
Yes.
When an area is too large or too damaged for a small patch, the affected drywall can be removed and replaced with a larger section.
The new drywall is then taped, finished, and blended into the surrounding surface.
Do drywall seams need to be staggered?
Staggering vertical seams is generally preferred where appropriate because it avoids continuous joint lines and reduces four-corner intersections.
The exact layout depends on the room geometry, framing, sheet size, and openings.
Do you install drywall on ceilings?
Yes.
Ceiling drywall installation requires secure fastening, clean joint layout, accurate cutouts, and careful finishing because ceiling imperfections are often visible under raking light.
How long does drywall installation take?
The timeline depends on the size of the project, number of rooms, ceiling work, amount of cutting, drying time between compound coats, and the level of finish required.
Drywall finishing usually requires multiple stages rather than one continuous pass.
Is drywall ready for paint immediately after installation?
Not immediately.
After the sheets are installed, the joints must be taped, coated with joint compound, allowed to dry, sanded, and inspected.
The surface should then be properly primed before final paint.
How much does drywall installation cost in Irvine?
Cost depends on the amount of drywall being installed, wall versus ceiling work, room geometry, access, finishing requirements, existing-condition transitions, and whether texture matching is required.
For related pricing information, visit Drywall Repair Cost.
Need Drywall Installation in Irvine?
Whether the project involves a remodel, replacement wall, replacement ceiling, new framed room, or larger reconstruction area, the finished surface should be flat, straight, properly fastened, and ready for primer and paint.
The goal is drywall that disappears into the room once the finishing work is complete.
Get a Fast Quote for Drywall Installation in Irvine
For drywall installation Irvine CA, call (949) 850-3172 or use our Contact / Fast Quote page to tell us about the project.